What a scorcher of a summer, and who worried that we wouldn't get one at all? We know we did! For those of us who can't resist a bit of crafting outdoors, some seaside stacking rings - made with our glass cabs with some easy Sharpie drawings in lively colours, and glued onto a set of pad rings.
Can you feel the sunshine?
Monday, 22 July 2013
Monday, 15 July 2013
Playing with Words
This week we have discovered a new toy - a website really, tagxedo.com that lets you create some funky designs using your own words, favourite passages from books you love, websites, or any text...
This was what it gave us when we entered our blog address:
We can see this being a lot of fun. With the right words, it would make some excellent backgrounds for jewellery. And you can give form to your words...
Tagxedo works along similar lines to Wordle, which allows you to create word clouds. Here's a link to a Wordle cloud we made earlier. We find Wordle clouds a bit tricky to save as an image and print for the purposes of making something with them, but it is brilliant if you fancy livening up a wall with a cool new print.
We rate both apps as fab. :)
This was what it gave us when we entered our blog address:
We can see this being a lot of fun. With the right words, it would make some excellent backgrounds for jewellery. And you can give form to your words...
Tagxedo works along similar lines to Wordle, which allows you to create word clouds. Here's a link to a Wordle cloud we made earlier. We find Wordle clouds a bit tricky to save as an image and print for the purposes of making something with them, but it is brilliant if you fancy livening up a wall with a cool new print.
We rate both apps as fab. :)
Wednesday, 5 June 2013
Sweetly Scrapped
Today we'd like to introduce you to a lovely shop we found on our web travels - Sweetly Scrapped.
Run by Emily from across the pond in the US, it offers a fabulous selection of scrapbooking goodies as well as a freebie section of images for download which are free for personal use. We love the tags which we will definitely be using together with our handmade gifts for upcoming birthdays:
Cuuute!
Run by Emily from across the pond in the US, it offers a fabulous selection of scrapbooking goodies as well as a freebie section of images for download which are free for personal use. We love the tags which we will definitely be using together with our handmade gifts for upcoming birthdays:
Cuuute!
Labels:
Freebies,
Ideas,
Vintage,
Websites We Love
Wednesday, 29 May 2013
Kids' Party Ideas
My seven year old daughter had some friends over last weekend and they soon found a stash of trays and epoxy stickers that I had hoped would have been a well-orchestrated surprise at the next birthday party. They are all crazy about My Little Pony and Hello Kitty and I had some images that I knew would be great for making pendants and then taking home as part of the party bag.
So whilst the cat was out of the party bag, making these necklaces kept them quiet, focussed and entertained for a good long while:
(Incidentally, images of these and other popular characters are all copyrighted and as such you really should not make them up for sale, though I suspect a small bit of making for personal use may be allowed?)
Next time I won't wait for a birthday - they are all asking to do it again! But it would be a great crafty activity for a birthday party. We have plenty of slight seconds that are cheap as chips and perfect for letting the kids loose on their creative adventures. Get some magnets in also and some superhero images for the boys - they will all enjoy it!
I mean really, who cares about cutting a perfect circle when the lovely Rainbow Dash is smiling at you?
Labels:
Epoxy Stickers,
Family,
Ideas,
Kids Crafts
Monday, 27 May 2013
What Would You Put in Yours?
As you will have realised, we love jewellery that displays little worlds and tiny treasures. We have been playing with a few ideas for our fabulous glass vials - but we wondered, what would you put in yours? Answers on a postcard, or leave a comment below, far easier. The best idea will win a set of one of each of our glass vials (that is one sphere, one tube and a glass heart).
Here are some of our suggestions:
Not sure if you can see it very clearly, but there is one single dandelion clock in that tiny tube!
Teeny no-hole beads in pinks and reds
A little lock of hair - this my daughter's!
It doesn't look particularly appealing and perhaps I should have let it dry thoroughly before popping the lid on - a bit of earth from a place that I love.
What are your ideas? Closing date for suggestions: Sunday 2nd June.
Here are some of our suggestions:
Not sure if you can see it very clearly, but there is one single dandelion clock in that tiny tube!
Teeny no-hole beads in pinks and reds
A little lock of hair - this my daughter's!
It doesn't look particularly appealing and perhaps I should have let it dry thoroughly before popping the lid on - a bit of earth from a place that I love.
What are your ideas? Closing date for suggestions: Sunday 2nd June.
Saturday, 25 May 2013
How to Make a Glass Tile Pendant with a Bail
We realised recently that in all the blog posts we have written, there wasn't one on how to make a glass pendant using a bail instead of a tray. This can be tricky sometimes as the back of the glass isn't always very attractive after you have glued on your image.
The simplest way by far is to cover it with something more attractive.
Here I will show you how I do it.
I had a beautiful little bird image that I glued onto a cabochon and let dry for, oh, about a year... not intentionally, I just had lots of these from a previous project!
I got some Glossy Accents, E6000 glue, some glitter and a bail.
The birdie cabochon was nice but a bit rought around the edges, and the paper was obviously too big for the cab, so a bit of cutting and tidying was in order. The dried glaze that had oozed out of the glass cracked as I cut it but as it would be covered again with more glaze, this did not bother me. You can find it easier to use a nail file to tidy up the edges.
It bothered me more that the edge of the paper was so bright white, so I painted it with a purple pen to match the glitter I had.
So far so tidy. No sharp edges, no visible paper, no ink onto the image. All good!
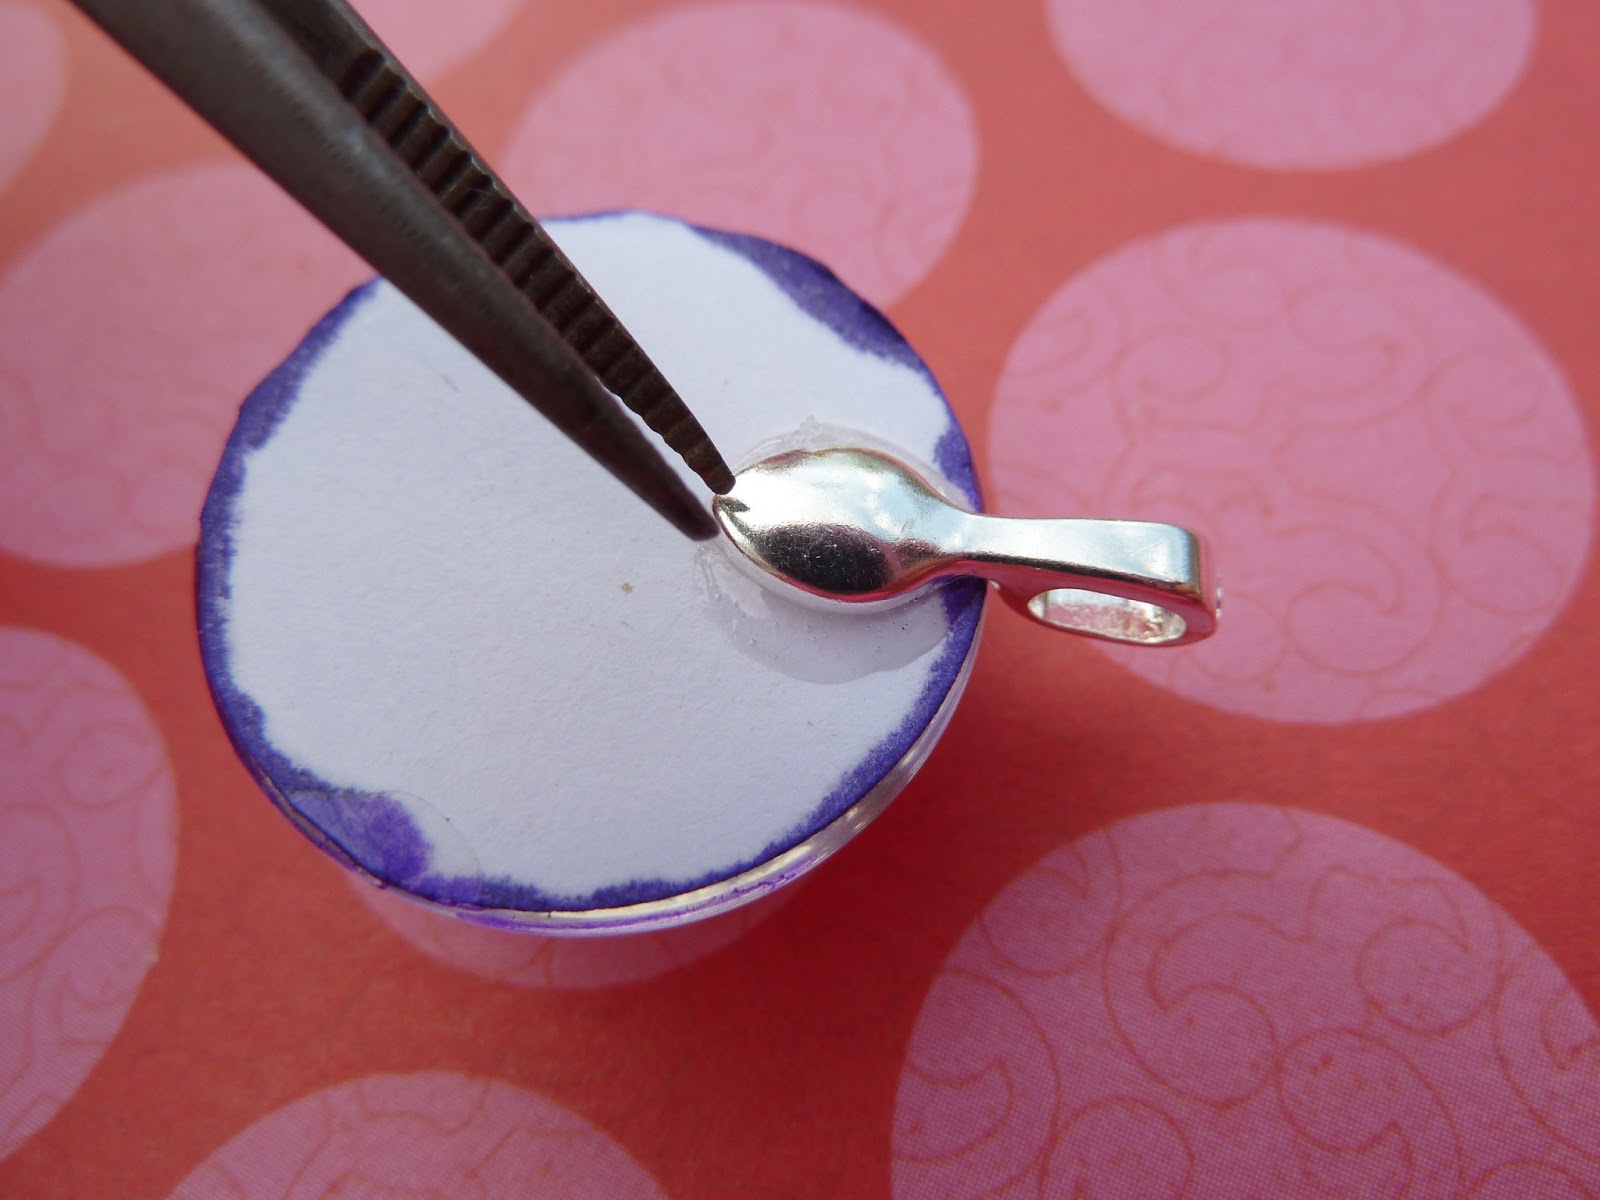
Next, I glued the bail onto the back using a smidgen of E6000 and ensuring it is nice and straight.
E6000 will leave 'hairs' so I used tweezers to remove these. You will see in the picture below a good blob of E6000 that doesn't look so good if left uncovered. If that is your intention, then you can always apply the E6000 with a tootpick onto the bail - just a small amount and none will seep out. Of course I didn't do it so elegantly here, but it doesn't matter as it will get covered up.
Once the E6000 was dry, I applied a layer of Glossy Accents....
And immediately sprinkled it with glitter so the entire glue surface was covered. Blow gently onto the piece so the excess glitter cleans off. The bail looks covered in this picture but it cleans up nicely when dry. You don't want to handle it too much at this stage as it will be very wet. I let this dry straight (aided by the tweezers!) for a good long while. A day or two is good.
When completely dry, apply another coat of Glossy Accents on the back. You don't really want to have bare glitter next to your skin or clothes. Again leave to dry. As this will be your top coat, look out for bubbles - keep a watch as they may not appear initally.
And there you go - a beautiful pendant, with a smooth glossy and professional looking back! The coat of glaze over the top (we used Glossy Accents again here) makes the glitter become more of a shimmer, a little more subdued. We like this effect a lot!
Other methods you can try for finishing the back:
- using ModPodge, cover with a decorative paper, and when dry, file the edges and apply a layer of glaze
- paint it
- try using a fabric covering instead of paper
- coat the back with a funky nail varnish
- decoupage the back with pieces of paper and ModPodge
- instead of glitter, try flocking material
- use a stamp and embossing powder
- if you sell these pieces, it's a good place to add your own signature, your logo or your website details
Show us how you make yours on our Facebook page @ jasminstudiocrafts.com!
The simplest way by far is to cover it with something more attractive.
Here I will show you how I do it.
I had a beautiful little bird image that I glued onto a cabochon and let dry for, oh, about a year... not intentionally, I just had lots of these from a previous project!
I got some Glossy Accents, E6000 glue, some glitter and a bail.
The birdie cabochon was nice but a bit rought around the edges, and the paper was obviously too big for the cab, so a bit of cutting and tidying was in order. The dried glaze that had oozed out of the glass cracked as I cut it but as it would be covered again with more glaze, this did not bother me. You can find it easier to use a nail file to tidy up the edges.
It bothered me more that the edge of the paper was so bright white, so I painted it with a purple pen to match the glitter I had.
So far so tidy. No sharp edges, no visible paper, no ink onto the image. All good!
E6000 will leave 'hairs' so I used tweezers to remove these. You will see in the picture below a good blob of E6000 that doesn't look so good if left uncovered. If that is your intention, then you can always apply the E6000 with a tootpick onto the bail - just a small amount and none will seep out. Of course I didn't do it so elegantly here, but it doesn't matter as it will get covered up.
Once the E6000 was dry, I applied a layer of Glossy Accents....
And immediately sprinkled it with glitter so the entire glue surface was covered. Blow gently onto the piece so the excess glitter cleans off. The bail looks covered in this picture but it cleans up nicely when dry. You don't want to handle it too much at this stage as it will be very wet. I let this dry straight (aided by the tweezers!) for a good long while. A day or two is good.
When completely dry, apply another coat of Glossy Accents on the back. You don't really want to have bare glitter next to your skin or clothes. Again leave to dry. As this will be your top coat, look out for bubbles - keep a watch as they may not appear initally.
Other methods you can try for finishing the back:
- using ModPodge, cover with a decorative paper, and when dry, file the edges and apply a layer of glaze
- paint it
- try using a fabric covering instead of paper
- coat the back with a funky nail varnish
- decoupage the back with pieces of paper and ModPodge
- instead of glitter, try flocking material
- use a stamp and embossing powder
- if you sell these pieces, it's a good place to add your own signature, your logo or your website details
Show us how you make yours on our Facebook page @ jasminstudiocrafts.com!
Friday, 24 May 2013
Time for Tea!
Today we thought we would share with you a cute little project that can be ready in - literally - five minutes.
Grab your kit - here we have a 25mm round bezel ring in antique bronze finish, a wooden tile to fit, a Sharpie pen, a couple of bronze plated charms in the shape of a teapot and a cup and some E6000 glue.
Start by painting a simple criss cross pattern on the tile which sort of resembles a gingham tablecloth.
Then glue on the charms
And pop into the ring bezel.
Et voila! A very simple piece that is certainly worth more than the sum of all its parts!
Grab your kit - here we have a 25mm round bezel ring in antique bronze finish, a wooden tile to fit, a Sharpie pen, a couple of bronze plated charms in the shape of a teapot and a cup and some E6000 glue.
Then glue on the charms
And pop into the ring bezel.
Et voila! A very simple piece that is certainly worth more than the sum of all its parts!
Bank Holiday Freepost Offer
We thought we ought to celebrate the Bank Holiday weekend by having another freepost offer. The offer is for free delivery to our UK customers by standard post (does not apply to upgraded post options), and our international customers can apply the same code to receive a £2.50 discount towards any purchases. No minimum order!
Simply use the code BANKHOLIDAY at checkout. Valid until midnight Monday 27th May.
Have a lovely weekend everyone!
Simply use the code BANKHOLIDAY at checkout. Valid until midnight Monday 27th May.
Have a lovely weekend everyone!
Thursday, 23 May 2013
Fabulous Domes
We can't keep our hands off these wonderful domes! The fishbowls are just amazing. They are great as a simple display container, mini-terrariums, snowglobes and um, fish bowls! Not that we'd recommend keeping any *real* lifeforms in there, but it would be fun to try with a bit of resin... We will bring you that tutorial when it's ready!
For now we have popped these on rings and dangled them from button lids. The main thing to note is the opening size, as you will need settings of the same size as the opening. The fishbowls are available in three sizes:
- 20 x 12mm (that means the orb measures 20mm across and the opening is 12mm so this one will be great for our 12mm rings and earrings)
- 25 x 16mm (perfect for our 16mm rings and earrings and button lids)
- 30 x 20mm (rings of this 20mm size are coming soon, but we do have button lids)
The button lids look like this:
All they need is a jump ring and a chain, and you will have a fab dangly bowl.
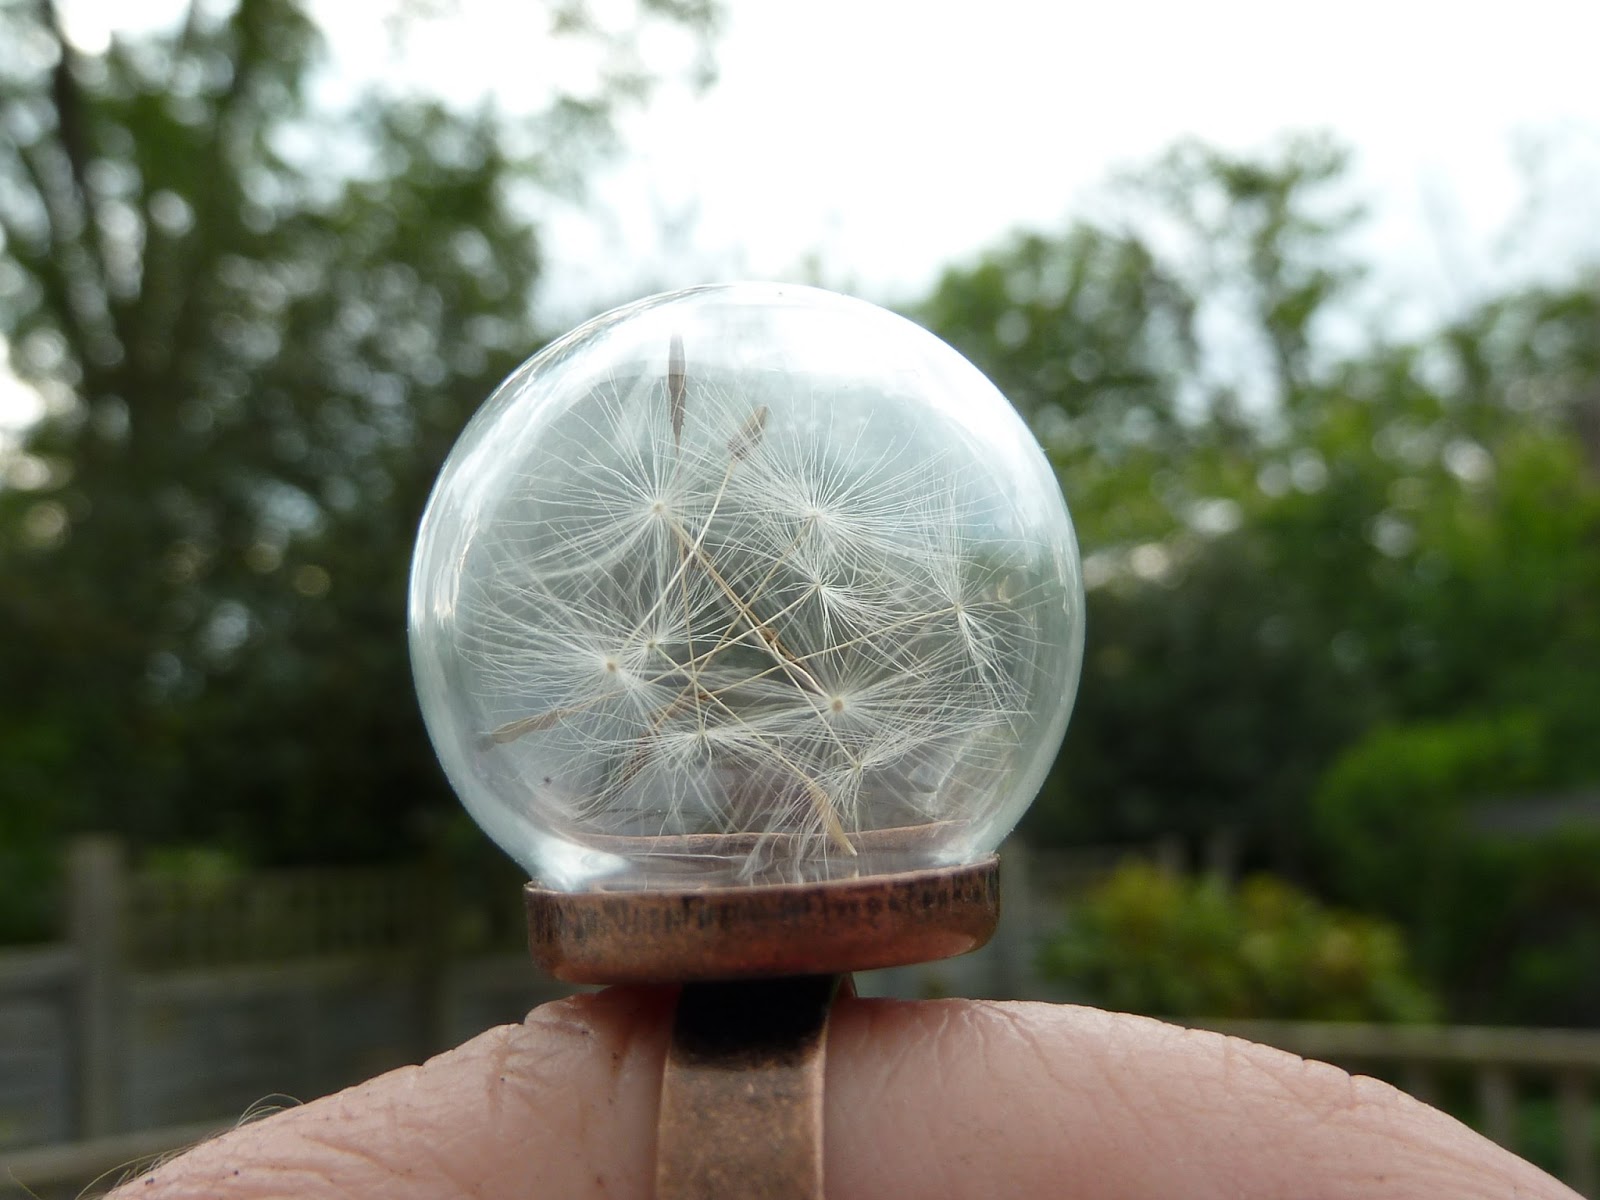
The most difficult decision will be what to put inside! We have been seeing a lot of dandelion jewellery lately and love its flowy ethereal quality:
But ahh, confetti from a memorable day! Poppy and bright and in your face and just perfect.
In the coming days we will be experimenting with liquids so keep a look out for new projects and ideas!
For now we have popped these on rings and dangled them from button lids. The main thing to note is the opening size, as you will need settings of the same size as the opening. The fishbowls are available in three sizes:
- 20 x 12mm (that means the orb measures 20mm across and the opening is 12mm so this one will be great for our 12mm rings and earrings)
- 25 x 16mm (perfect for our 16mm rings and earrings and button lids)
- 30 x 20mm (rings of this 20mm size are coming soon, but we do have button lids)
The button lids look like this:
All they need is a jump ring and a chain, and you will have a fab dangly bowl.
The most difficult decision will be what to put inside! We have been seeing a lot of dandelion jewellery lately and love its flowy ethereal quality:
But ahh, confetti from a memorable day! Poppy and bright and in your face and just perfect.
In the coming days we will be experimenting with liquids so keep a look out for new projects and ideas!
Wednesday, 22 May 2013
Glasses Chain
If you are anything like me - myopic and astigmatic to a T - you probably won't have a need for these. I never can take my glasses off, all hell would quite possibly break loose if I did. But if you are an occasional glasses wearer, say for reading, you will understand the value of a chain for your glasses, that you can hang around your neck, always keeping your specs at hand ready to be put on at a moment's notice.
We now stock the handy little rubber bits that connect the chain to the glasses, so we thought a trial was in order. We got together some chain, jump rings (not shown), some fancy bow connectors that have just arrived in the shop, two 10mm connector blanks and a set of epoxy stickers to fit - as the connector blanks are double sided we used four stickers. We picked a piece of scrapbooking paper with a sweet little rose pattern for our inserts. All the metal pieces are vintage copper finish.
We started by making the little connector blanks, first stick the epoxy domes onto your patterned paper and cut around this, then ModPodge the little pieces onto your connector blanks, allowing them a bit of time to dry. If the glue is too much and overspills (like it did here!), it's not a big problem as it cleans up nicely when dry.
Then lay out all your pieces so that all your bows and your flower images are facing the right way up.
Attach to your chain, pop your rubber connectors on with a jump ring and model on your glasses. Result!
We now stock the handy little rubber bits that connect the chain to the glasses, so we thought a trial was in order. We got together some chain, jump rings (not shown), some fancy bow connectors that have just arrived in the shop, two 10mm connector blanks and a set of epoxy stickers to fit - as the connector blanks are double sided we used four stickers. We picked a piece of scrapbooking paper with a sweet little rose pattern for our inserts. All the metal pieces are vintage copper finish.
We started by making the little connector blanks, first stick the epoxy domes onto your patterned paper and cut around this, then ModPodge the little pieces onto your connector blanks, allowing them a bit of time to dry. If the glue is too much and overspills (like it did here!), it's not a big problem as it cleans up nicely when dry.
Then lay out all your pieces so that all your bows and your flower images are facing the right way up.
Attach to your chain, pop your rubber connectors on with a jump ring and model on your glasses. Result!
Labels:
Epoxy Stickers,
Ideas,
New Items,
Tutorial
Subscribe to:
Posts (Atom)