Showing posts with label Friends' Makes. Show all posts

Tuesday, 20 June 2017

When All Thoughts Turn To Holidays...

Last week we were lucky to have with us two brilliant Year 10 students undertaking work experience with us. Tabby already works with us on Saturdays and she opted to also spend her work experience week at the shop. Amber had not been with us before but after the first ten minutes it felt like a team that had been together since the start!

The girls were tasked with making a piece of jewellery symbolic of their holidays, and here is it - a beautiful memory bracelet:


Below they explain the process:

Holiday Charm Bracelet

This bracelet is about capturing precious memories from your holiday whether they’re from a week ago or three years ago in the summer sun –and you would like to remember the colours of the shimmering waves, or the crabs scuttling along the shore- or a trip abroad to Italy or France where you ate foreign delicacies while feasting your eyes upon iconic land marks -now is your chance to combine these memories and make a beautiful charm bracelet.

We decided to do a seaside holiday charm bracelet. My bracelet has pearls, swirling sea shells, a bottle of sea, a tiny picture of a boat on the sea and a few hand-moulded polymer clay treasures.

To start this easy, quick and fun project you will need to get 4 beads that are sea/beach inspired, shells, pearls, turquoise turtles/fishes are perfect for this sweet accessory. Make bead charms with them by using headpins.

Then get polymer clay in pink or orange to make a sweet little starfish charm. You can make your starfish by making a ball first from polymer clay, then pinching 5 sides to make the star shape. To add detail to your starfish get a toothpick and make small holes on the top and a star on the bottom, then put in oven at 125 degrees for 20 minutes- you must preheat the oven for at least 20 minutes before so the oven is hot.

To make the ‘beach bottle’ get sand and very small shells (possibly from your holiday) however if you cannot get these materials you can use glitter and seed beads.


Another polymer clay charm you can make is a shell. Make a ball with yellow polymer clay and push it down a bit so it’s the shape of a burger. Make it into a v-shape and at the top of this V make indents that follow to lines. Make these details with a tool if you have one, if not just use a toothpick. Cover your polymer clay shell charm in mica powder to give it a golden magical shine, to bake it do the same instructions from before with the starfish.

The last two charms for your bracelet are glass tiles with photos behind in small metal trays. First get 2 10mm glass cabochons and cut out a photo from your holiday or draw a memory from your holiday the same size as the glass cabochon, then seal with ModPodge. After it dries use silicon adhesive to stick the image to the glass, only use a drop but enough so that it spreads around the whole cabochon. 

After that dries stick the cabochon to the tray with ModPodge, and wait 24 hours.

After all the charms are ready, dry and baked, you can assemble them. First cut a large link chain to the length of your wrist, use two jump rings one on one side, and one on the other with a clasp. Put jump rings on all of the charms and attach them to the chain. Put the charm bracelet on and feel like you’re in the sun on holiday again!


Have a lovely summer!
from Tabby & Amber x

Friday, 24 June 2011

Fluxe vs Amazing Glaze, a Comparison Guest Blog

Seeing as my list of things to do just keeps growing, I thought I should hand over a review of Fluxe and Amazing Glaze to the uber-crafty Vicky from Tynemouth Collectables, she's always trying out new products and methods so I thought I would ask her if she would do this for me - luckily she agreed, and these are her findings.  Thank you so much, Vicky!!


Judikins Fluxe vs Amazing Glaze – Get Set to be A-Glazed!

When asked if I would be guest blogger for Jasmin I was quite flattered and more than keen to help her work out the difference between Judikins Fluxe Enamelling Resin and their Amazing Glaze Embossing Glaze. By all intents and purposes, when researching the two on the good ole internet it is very hard to differentiate between them.

OK, Amazing Glaze is designed to be used with embossing powders and the likes for making a glaze on all sorts of paper and card surfaces – ideal for cardmakers and scrapbookers alike.

Fluxe is described as an “enamelling” resin and can be used on a wide variety of surfaces including metal and glass. I therefore would have expected Fluxe to appeal more to my uses in making jewellery and filling small metal trays or pateras. So I was surprised to find in one of the “projects” featured on Judikins website, they were filling their trays with Amazing Glaze? Hmm…the confusion abounds!! I had no choice but to do a test and compare results!! 


Firstly I drew a 1” circle around two images that I was going to use and cut them out, making sure I removed the part with the pen line. I then lined the inside of the tray with Mod Podge, placed each disc of paper on top, gently pressed it down to remove any bubbles and smooth the paper.


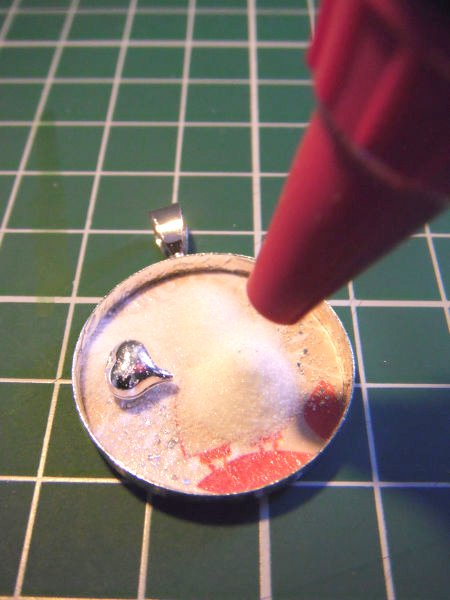
I then gave it a second coating of Mod Podge. This both glues the paper in place and seals the paper to prevent any of the inks from running. After leaving the trays to dry, I lined them up and put a small amount of an old embossing powder I had, to add some sparkle and put along side it a small heart shaped charm so that I could play with how easy it is to move items around and to add an extra dimension to the pendants. I dipped the tray in to the pot of Amazing Glaze, levelled it flat and then filled the second tray with the Fluxe. 


Having two small dogs and a flight of stairs to contend with when carrying these trays from my crafting area to our grill/oven, I decided health and safety was more important and set to work with my heat gun. (Please be aware, if you pile the powder high, a heat gun will blow the top layer of glaze across your table!) 


Both powders melt in the same way and have the appearance of melting sugar. As the top layer melts, it rolls away to the sides, exposing the powder underneath until all has been melted. When the glaze is still soft, you can move around any little charms or embellishments you used until you are happy.


I used a pair of bent nose pliers, but a pair of tweezers would do the same job. Be Careful not to touch the pendant with your fingers as it will still be very hot. I had to refill the trays an extra three times to fill the tray to the top, so this is brilliant to give you the opportunity to add different embellishments in different layers. Should your tweezers get stuck in the resin, or if your charm or embellishment gets stuck in the wrong position, you can reheat the resin until soft and move the item accordingly.


Leave your pendant to cool for a few minutes and Hey Presto! You have your perfectly set, hardened, ready to wear pendant! Attach a necklace and away you go!


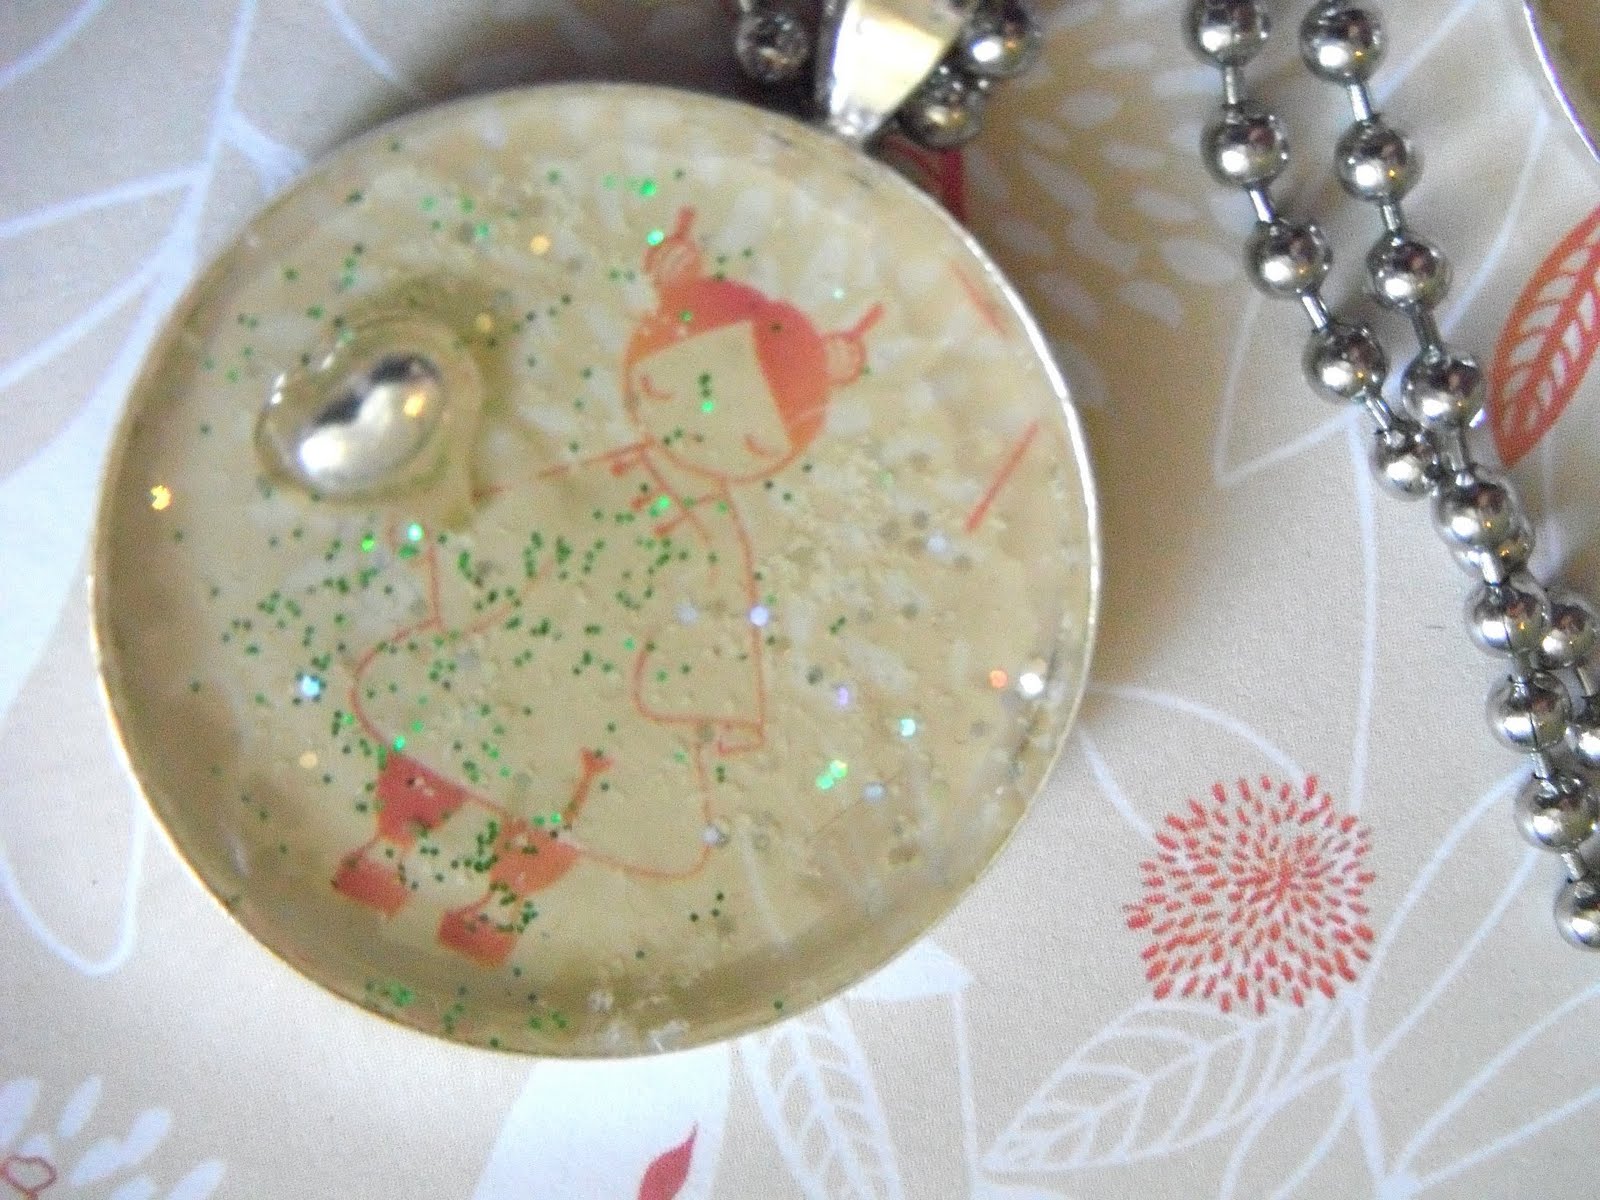
But that still hasn’t answered my question about the main difference between the two? It’s tough. They have the same consistency, they melt the same and they set the same. Initially they look the same so in all honesty, I don’t see a whole lot of difference. The picture below shows the two trays side by side. The one on the right is made using Amazing Glaze, the one on the left with Fluxe. I find that the Amazing Glaze has perhaps a slightly clearer appearance to the Fluxe.


Amazing Glaze is a bit more forgiving when wiping off any melted glaze from the tray, whereas the Fluxe was a lot more stubborn. I left both trays overnight before writing this post and have discovered that the Amazing Glaze seems to have turned slightly darker.

Compare the two again below, sitting atop the original paper. The Amazing Glaze is somewhat darker than the Fluxe.  


All in all, both glazes are easy to use, non-toxic and suitable for anyone able to use a heat gun.  They can both be melted at 130oC in a toaster oven – though I have not tried this so cannot advise, but I hear that you don’t get the problem of the powder blowing away then.

The glazes will be perfect for those projects that I want to look a bit more weathered, maybe using an antiqued vintage setting, so I think I will definitely be playing some more with the glazes.  Which is better?  It all depends on your needs and what effect you wish to gain.

Happy experimenting!   

Thursday, 16 June 2011

Friends' Makes - Tynemouth Collectables

When I set off on this little adventure at the start of the year, I was excited to find out that there were people out there who agreed with me that glass tile jewellery is a really satisfying way to present your favourite art.  And soon I was talking to all sorts of wonderful crafters and jewellery makers - every one of them an artist in a different way.  There has been one person whom I have been talking to since the very beginning and who is quickly becoming a good friend - although we have never met in person!  Her name is Vicky, she runs Tynemouth Collectables, a jewellery business, and makes beautiful pieces using some of the items from my shop, as well as some carefully sourced papers and images.  Look at this beauty:


And this striking image on the bag hanger:


Vicky was also the person who sent me that stunning pendant she had made earlier in the year, which I'm still wearing!

She is a devoted crafter and a talented artist - and now I have discovered that she has the patience to put up with my ranting when my life gets hairy! 
Vicky has big plans for her business and I am in no doubt that her own adventure into jewellery making will be a successful one.  I know she is now diversifying into steampunkery, so keep an eye on her website! 

Saturday, 30 April 2011

Friends' Makes - Petits Bijoux

Check out these gorgeous new makes by the lovely and talented Emma from Petits Bijoux:

 Seeing the Royal mood we're in,  I expect the Union Jack earrings will be popular!

Absolute gorgeousness.

Emma is busy getting ready for craft shows, so her glass tile jewellery is not in her online shop yet, but she has a beautiful choice of wirewrapped jewellery on Folksy, see it here, just look at this stunning example of the jewellery she makes:

So pretty.

Wednesday, 27 April 2011

Friends' Makes - Cockburn High School

I recently got chatting to the lovely Kath who works in the art department at Cockburn High School in Leeds.  She promised me she would send me pictures of the items that she and her students had made using some of my items.  Little did I know I would be in for such a treat...   just look at these works of art:


Make sure you click on the above picture for a glorious close-up (click twice and it gets even bigger!).  Any one of these pieces could happily sit in the window of a jewellery boutique.  The colours are beautiful and the combinations remind me of the work of Kandinsky (though they remind Kath of Klimt!)


And this is how they did it - carefully moulded canes of polymer clay in stunning colour combinations.  The ones with multi coloured circles are extruded through a square die and then stacked into 4x4 or 5x5 squares, then the canes are cut into slices, placed into some of my pendant settings, baked in place, and varnished for a gorgeous finish.

Just beautiful.  I really look forward to seeing what Kath and the girls come up with next!