Monday 28 February 2011

How NOT To Make a Glass Tile Pendant Part 2 - the Blue Rinse


The picture says it all...  Just about everything is wrong with this pendant.   A good reminder of what not to do.

First of all, it is pretty obvious that I used far too much Diamond Glaze behind the glass.  In fact, I used too much behind the paper too.  There is so much that it still looks wet, several weeks after making it!

Secondly, the blue...  The whole picture turned blue!! The paper was one of my beautiful Chiyogami papers, bright with reds and pinks and golds.  And now it's just blue.  And this piece of paper was really really well sealed with a hundred layers of ModPodge! Any guesses what caused it?  Yep, the tray.  See the tray is bronze plated?  Bronze and copper platings react with Diamond Glaze and the outcome is that your images will develop a blue tinge.  Sometimes it is a nice blue tinge that can give your images a lovely vintage hue.  This is not in any way nice:


Two things to do here:  deconstruct and re-do!  If this happens to you, just leave the pendant to soak completely submerged in water overnight.  That will soften the Diamond Glaze if it hasn't completely hardened and you should be able to prise the glass off the tray by morning.  Wash the tray and glass thoroughly and dry before using again.  The tray will not discolour if it is completely submerged (as opposed to half-in-half out) and dried afterwards.

Before you use them again, one very important step - when using bronze and copper plated components, ALWAYS seal the trays well - so apply a good coat of ModPodge to all the parts of the tray that will come into contact with the Diamond Glaze and allow to dry.  Then you're all set!

Sunday 27 February 2011

How NOT To Make a Glass Tile Pendant Part 1 - the Runaway Ink

I have made a selection of mistakes to show you and to guide you through the main pitfalls you may encounter whilst practising this craft.  

First whoops:


This had the potential to be such a beautiful pendant - as it is, it has lost its sparkle and looks frankly a bit of a mess!  Main issue with this is that the ink on the pretty handmade paper ran like crazy...   If you use handmade papers this is something to watch out for, as the inks tend to run more than on machine printed papers.  And the blues seem to be more susceptible - at least on my Japanese papers.  So this attempt was made on purpose, to show what happens when you use papers directly without sealing them.

You see, Diamond Glaze is water based and it is also very runny - it will soak through most papers and if the inks are not waterfast the Diamond Glaze will grab them and run!   It seems to have even gobbled up the lovely golden details that bordered the flowers before:


And there is only one solution to this problem - seal your papers thoroughly before using Diamond Glaze!

Saturday 19 February 2011

A Vintage Image Feast

Today I thought I would share with you one of my very favourite resources for vintage graphics.  The Graphics Fairy is a blog, nay, a treasure trove of beautiful antique images - curated by the fabulous Karen who very carefully collects them, beautifies them and then generously shares them with the world.

The images are copyright-free for any crafting purpose for fun or profit, though please read the terms of use.

They are organised by category and in the blog you will find all of the vintage themes that you can see in the shops at the moment.

You want birds?
                 

After Eiffel Towers??


How about hearts?  of the anatomical kind of course.  It is after all, well past Valentine's Day.


Insects?  Deer?  Vintage postcards?  Coiffured ladies?? It's all there.
 
And this one will probably never fit in a pendant, but it made me smile - antique paper dolls where you be the hairdresser, and by the looks of it, supreme mood-maker - click on the image for a larger view and you'll see what I mean.


Just think of all the wonderful vintage style projects this amazing blog offers... 

Simply put, it is a thoroughly excellent resource. Thank you Karen!

Thursday 17 February 2011

Coming Soon to the Shop - the Shallows

These babies have just arrived and they will be making it to the shop in the next few days:


Gorgeous shallow round trays in silver plate, and antique bronze - and of these last, there are two options, smooth and serrated edge!   I can't wait to try them out.  The edge measures under 1mm so they'll be perfect for simply applying Diamond Glaze over a graphic.  I have sooo many ideas for them.  :)

Wednesday 16 February 2011

A Surprise Through the Post

Over the weekend I received a little parcel that I wasn't expecting - would you look at this beauty?? 


It was made by the lovely Vicky from Tynemouth Collectables - she makes beautiful glass tile jewellery using exquisite papers, and she thought she would share her work with me.  I love it!  and it's green!   How much do I love green?  A lot.  That's how much.  

But more than that this piece is an example to us all of what can be achieved with this craft.  It reminds me of a beautiful dichroic glass pendant.


OK, I've got to upgrade from a fleece to a snazzy outfit to do this pendant justice - but I still love wearing it.  Thank you Vicky! 

Tuesday 15 February 2011

Petite Chiyo Earrings

It's been a busy weekend at Jasmin Studio Crafts Towers, getting more materials in, trying to get some more out, and I received a beautiful surprise in the post that made my day - I will blog about it this week.

I also made a little bit of time to make some earrings using my Japanese Chiyogami papers.  Oh my those papers, they need a whole blog to themselves!  I will give them their own dedicated post soon - in the meantime, suffice to say that if you use any precious handmade papers, you must seal your images 'till you can seal no more', else they are prone to misbehaving.

Alas, I gathered my materials,


Sealed and popped some Chiyogami paper into the bezel cup,


These babies are small, the glass measures only 8mm across - that's about the size of your small finger nail.  Photo for reference:


And lo, I had some earrings!


A perfect pair of earrings


Rather pleased with the way these turned out, wouldn't you agree?


Friday 11 February 2011

How to Make a Glass Tile Pendant (using a tray)

I have to say that using trays is my favourite way to make glass tile pendants - the metal bases give them a very 'finished' look.  I am using here a silver plated tray and a copper plated one.  There is a slight difference in the way you use the two - more on that a bit later.

First of all here is a small shopping list of items you will need:
  Images (laser prints or professionally printed images on thick smooth paper)
  Glass shapes and metal trays of the same size
  Craft punch (optional but makes life so much easier!)
  Sealant - ModPodge is great
  Glaze - Diamond Glaze, Glossy Accents or DG3 are all fab
  Strong Glue - E6000 is my favourite

First, you need to choose your images - the fun part.  The ones I use here are readymade 1 inch collage sheets by Piddix, Printables and Digitalya.  I use a laser printer on thick smooth paper.  I find cardstock is too thick for my purposes and can sometimes be textured and porous, and letter paper is far too thin, so something in between is ideal, so long as it has absolutely no texture and is completely smooth.  I use a very smooth paper from our printing shop that is upwards of 200 or 250gsm. Some glossy coatings may run once you apply the glaze, so do not use photo paper, try instead to find a plain paper with a slight sheen but without a coating.  We can only recommend laser prints for this craft - inkjet inks can often run, sometimes after several days of your pendant looking beautiful it will suddenly look all wrong.  Best not to risk it and start with a good print.


 (Collage sheet credit to Piddix)

Cut your images to size.  I use a cutter - makes life sooo much easier.  The ones that have a pull-away out bottom cover that you can see through are ideal, but if you don't have a cutter just make a template out of card, or trace around your glass shapes with a pencil and cut around that.


Make sure that the images you will be using are thoroughly sealed with several coats of ModPodge, MicroGlaze or your favourite choice or sealant and completely dry.  Depending on the inks on your prints, you may be able to skip this step, you may have to experiment.  You will probably find that the laser prints and professional prints (say if you use wrapping or scrapbooking papers) will not need as much sealing as inkjet prints.  Inkjet prints will need several layers of sealant before they will be usable.  Some inks will run already when trying to seal them!  If so, don't despair, switch to laser prints on good paper and see the difference.

Remember you will need to seal the back, the front and the sides!  I find it useful to lay my cut outs on a piece of plastic, here I use one of my grip-seal bags which are flexible and sturdy enough for this.


Repeat several times for inkjet inks, or a couple for laserjet inks.   Wait until each layer is dry.  This could be a day or so ...each!  You have to ensure each step is completely dry, otherwise you could have problems later on - can't emphasise this enough!

Not quite ready - wait a bit longer!

Apply a drop of Diamond Glaze over the centre of the sealed image.  Don't worry too much about bubbles at this stage.


Press the glass into the wet glaze.  Pressing hard will make the bubbles pop out at the edge.  You can use a heavy object to press down onto the glass whilst it is drying. 


It is normal for the piece to look a bit cloudy at first - Diamond Glaze is not clear when wet.  However it will still look cloudy after a day or so if you have used too much Diamond Glaze so look out for that - it means the edges have dried before the centre could do the same.  If you keep the piece in a warm room or even on a heater on a cool setting, it should dry overnight - but please wait for a day or two before using it in jewellery.  It helps if you keep a heavy book over the top of your piece throughout the drying time to ensure the paper and glass stick consistently.

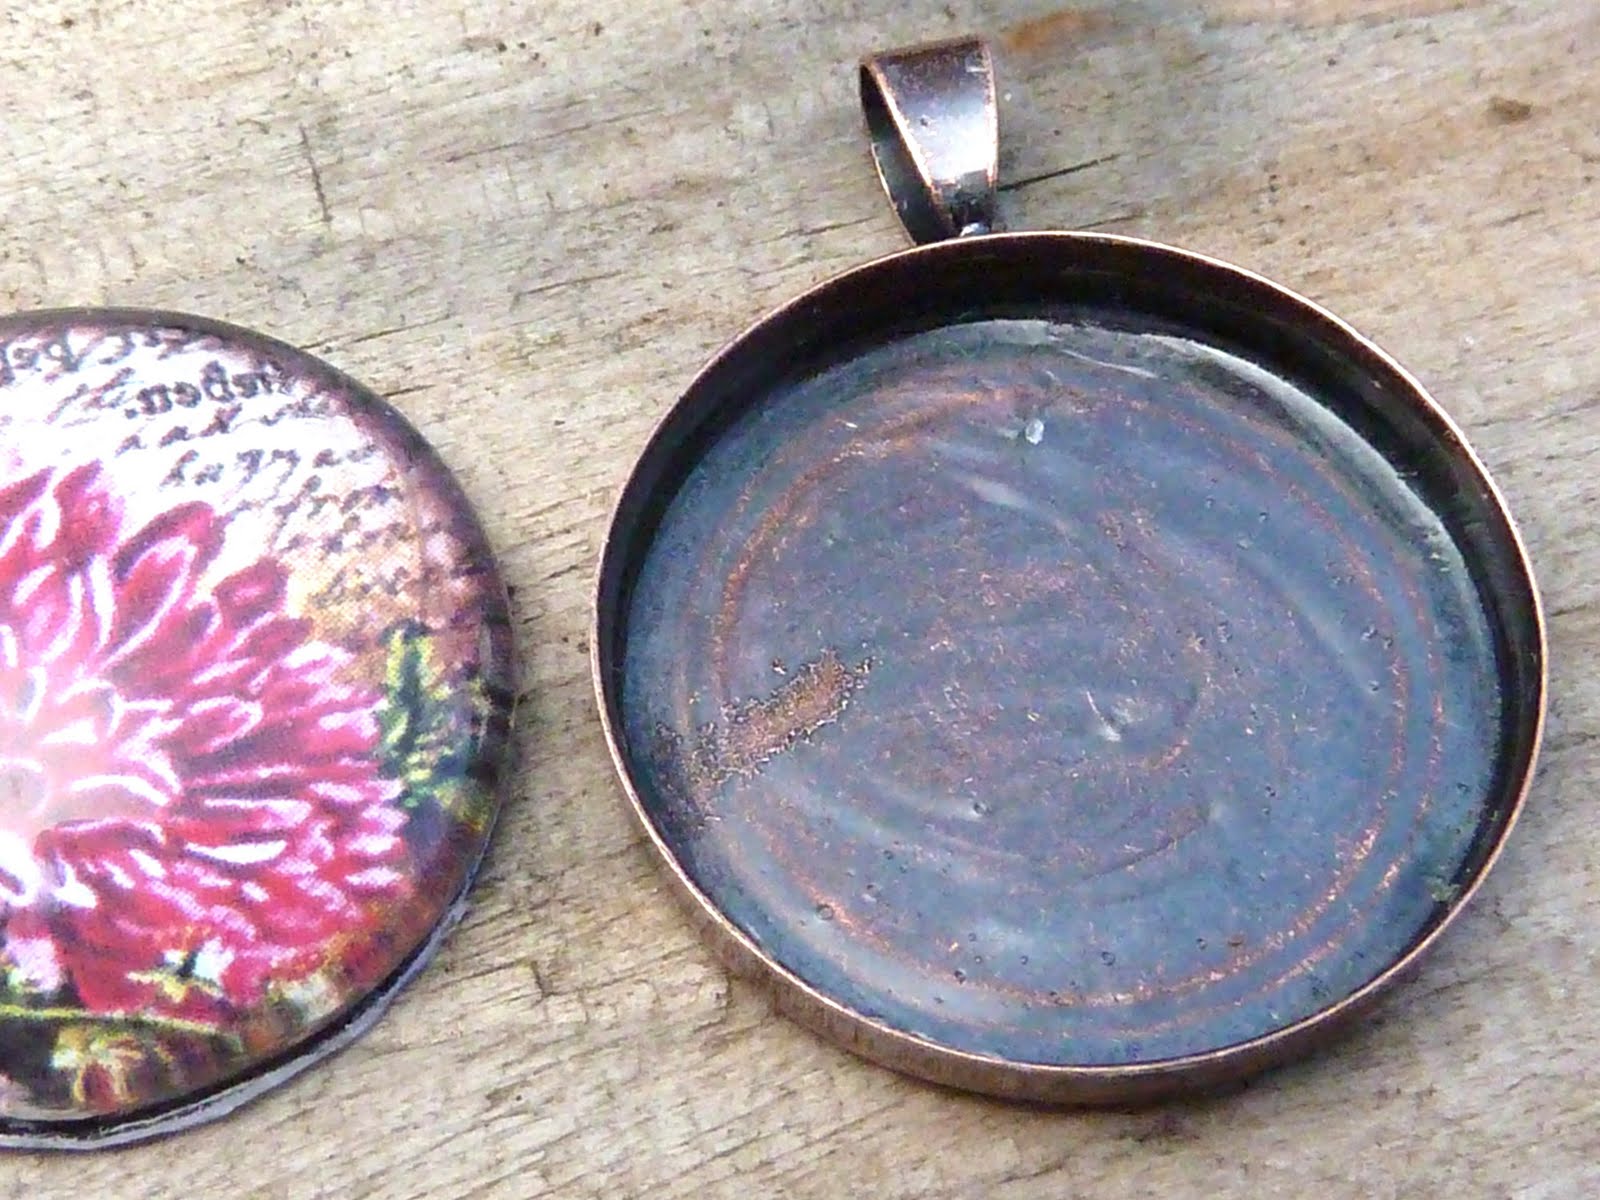
Over the following days, inspect your pieces and if they are completely dry, you can now glue them into your tray.   If you have chosen to use any metal trays that are copper, brass or bronze or any antique/vintage platings you will need to coat your tray with a layer of ModPodge as Diamond Glaze has a tendency to react with these platings and turn blue which will give a distinct blue hue to your images.


Apply a drop of glue to the back of the pendant blank - I have used both Diamond Glaze and e6000 successfully here - the key is to ensure your image is well sealed and most glues that are suitable to stick paper to metal should be fine.   If you use Diamond Glaze you need to watch that it doesn't wet the image too much, so use a drop or two and ensure the rest is completely dry before you apply it.


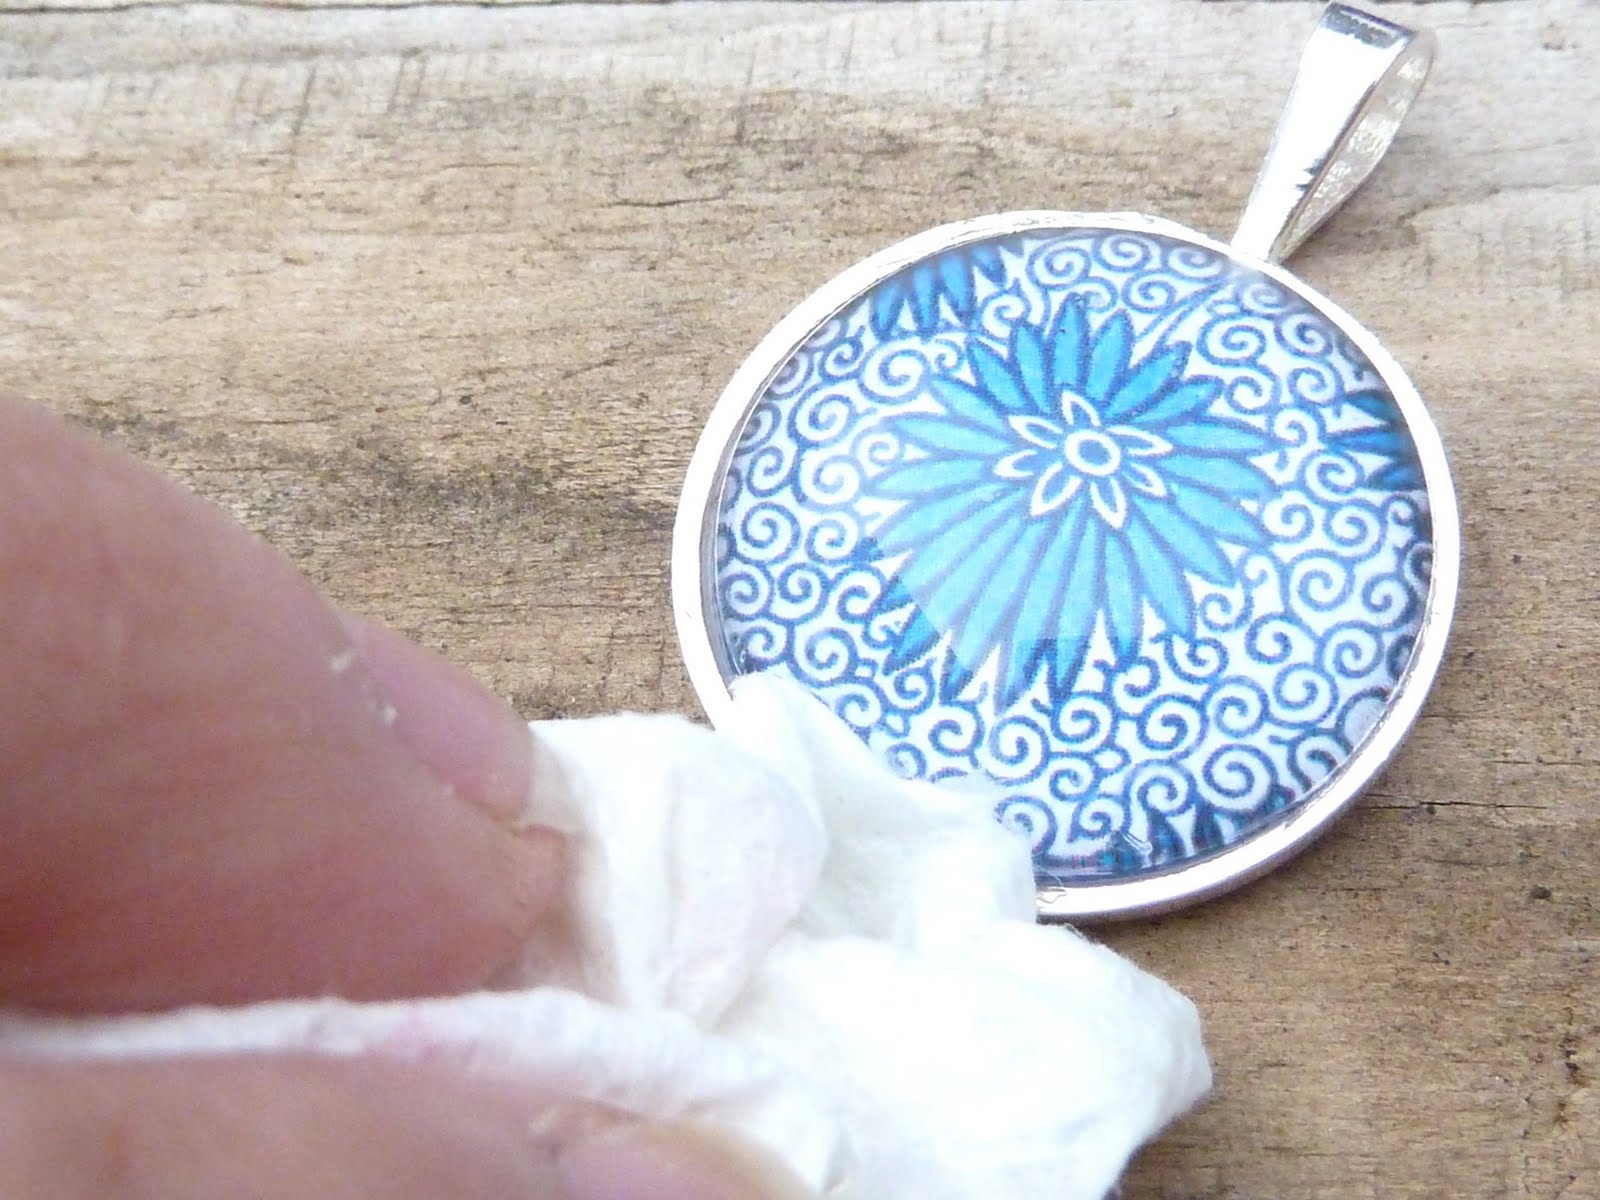
Once you press the glass into the tray you may get a bit oozing out of the sides, so wipe that away with a paper towel and once dry, wipe the glass with a damp cloth to remove any bits of dried Diamond Glaze (which is water soluble even when dry, so whilst this is handy as it will wipe away from the glass, it also means your work will be affected if the piece gets wet, so always advise your wearers not to wet the pieces).


I have used e6000 successfully to glue the glass into the pendant tray, with no effect to the image.  Neither will you get any excess out of the sides if you use just enough.  However one downside of using the e6000 is that it is very permanent so if you make a mistake you will not be able to re-do the piece, unlike with Diamond Glaze which can be resoaked so that you can start again.


As E6000 is stronger than Diamond Glaze, there is always a risk that it might pull the image away from the glass at points - the trick here is to apply a tiny line of E6000 around the edge of the tray instead of a blob in the middle.  But generally if your paper is thick enough, and your work has been dry for some days, you don't need to be too careful.


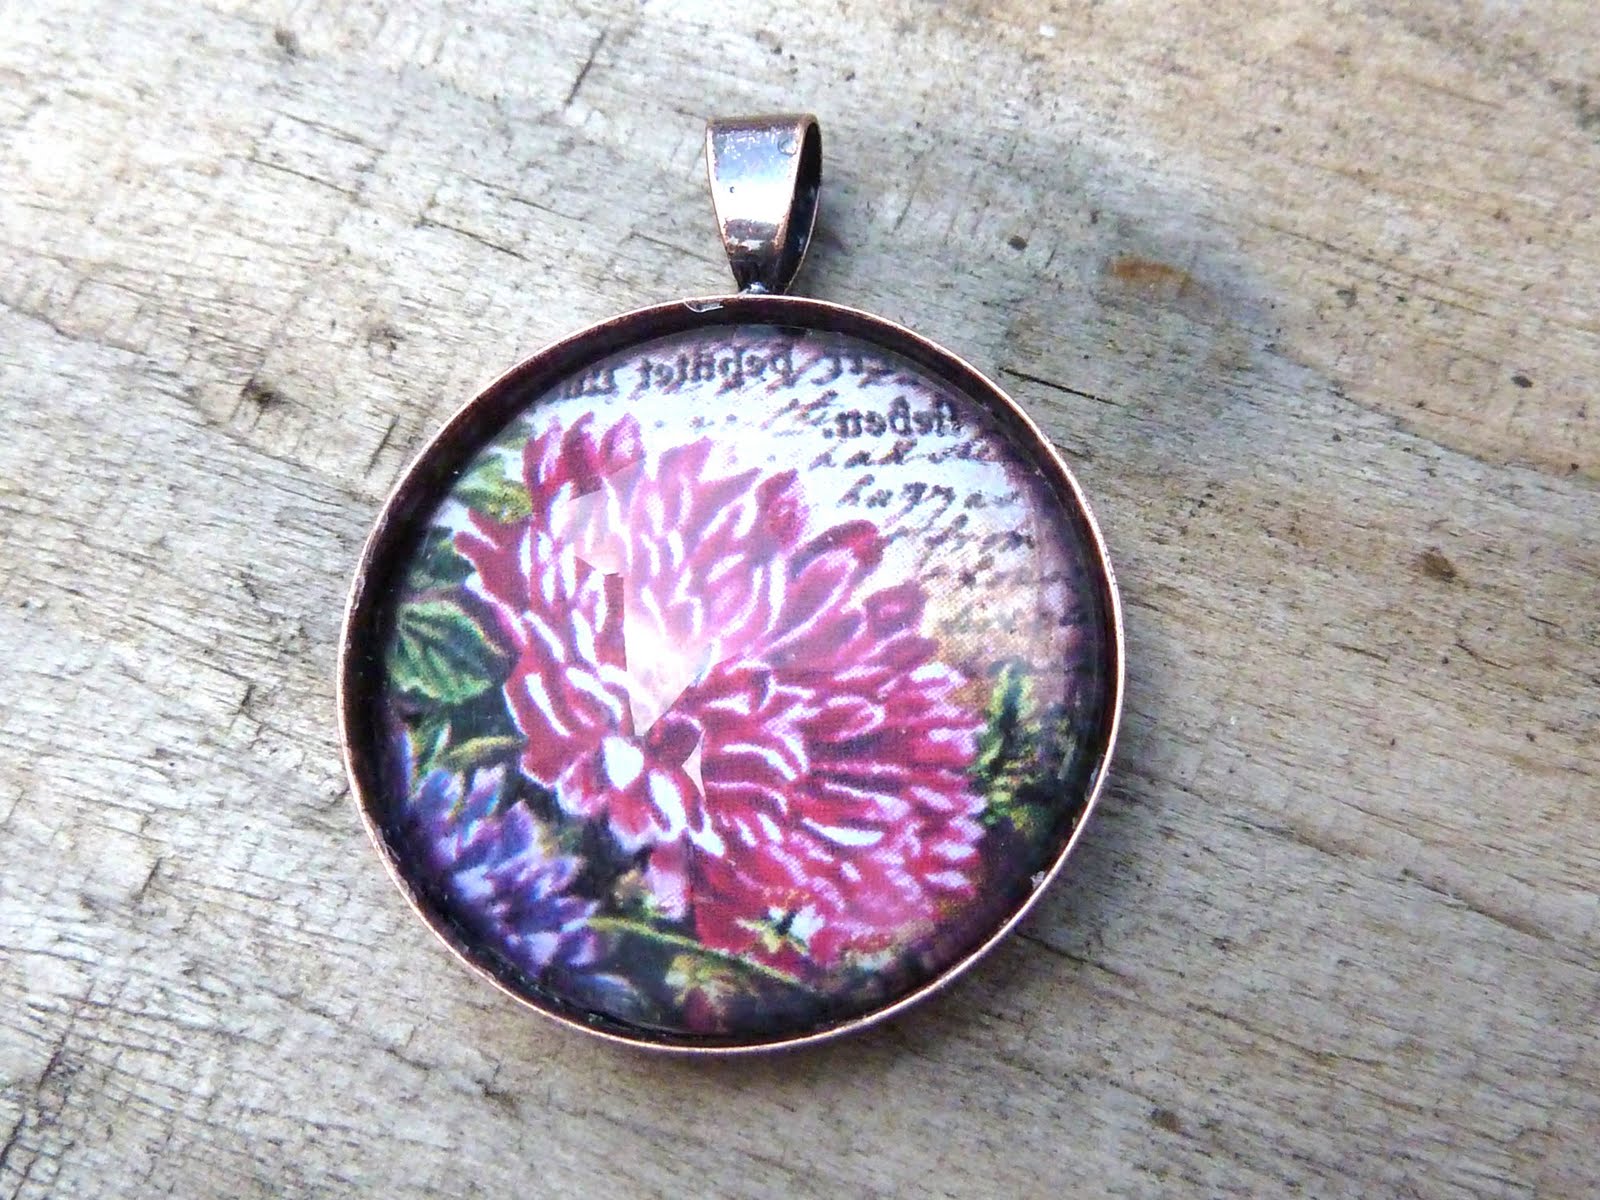
When it has all dried, inspect your masterpieces....


Wear them with pride!


 And because you will quite possibly have caught the bug, make more!


Enjoy!!!

(All images used in pendants & ring can be bought at Piddix, Printables and Digitalya.)

Thursday 10 February 2011

A Basic Shopping List

Before the tutorials and product reviews begin I just wanted to give you a little list of things to gather in preparation for making your own personalised jewellery.  I think we will start with glass tile pendants as the materials are easy to come by.  But first of all, do check in your cupboards, as you may already have some of these bits!  

You will need:

  • clear glass tiles or cabochons
  • glue-on bails or a pendant tray
  • the images that you want to use
  • Mod Podge or decoupage glue or PVA (craft) glue - you will use this to seal your images
  • Diamond Glaze - this is a clear resin-like glue that shows a clear image through the glass
  • toothpicks/lolly sticks
  • a cheap small brush
  • strong glue like E6000 or superglue (if using the bails)
  • a chain/necklace for the pendant

What if you don't have all of those materials?  well obviously my shop will be happy to help!  Thinking laterally can usually help - maybe you don't have a glass cabochon, but do you have any old mosaic pieces?  so you have no bail - do you have a small metal disc into which you can punch a hole for a jump ring?

A word about materials - experimenting is key!  different papers and different inks react with the sealants and glues in different ways, so be prepared to try this out a few times before you get the process right for your chosen materials.  As such, you can try different products and brands until you find something that you are happy using.  What I intend to do here is to give you a "recipe" that works for the most part - however some inks can be unpredictable, so do please gather a bit of extra material for your experiments. I will talk more about different materials and products and how they work, and I intend to tell you all about my failed attempts too (and there have been many!) so you can avoid my mistakes.

In fact, now you have all your materials together, then now might be a good time to do some of the preparation work.

First of all, cut out a few of the images to the size of the glass you intend to use, and coat them with your choice of sealant.  I like to use ModPodge, but you can try different products.  If you have some kids PVA glue, then mix some with a bit of water and it makes a pretty good sealant, even if it does not give the most professional finish.

Coat your image with the sealant about three times per side letting it dry well in between coats.  Once the final coat is applied, leave it alone to dry completely.  After 24 hours.check it for any ink runs, see if it's a good even finish and make sure there are no gaps in the covering.  And get ready to use the rest of your materials!

Wednesday 9 February 2011

Getting Ready

Whilst you are getting your supplies ready to embark on this jewellery making adventure, I thought I would give you a couple of free images to start you off.  These are for you to download and to do as you wish with them.  How about if I give you the images I used on this blog's banner?  

Here we have, a cute little fairy:


A bird with berry:


A Mediterranean tile pattern:


And a sample of handmade Japanese Chiyogami paper:


Enjoy!

Tuesday 8 February 2011

A Little Intro

So this is me, Jasmin *hi*, and this is my blog about making your own personalised jewellery.


Some of you will already know me from my new online jewellery supplies shop. I have recently started this little jewellery craft shop as I love all forms of jewellery, making and wearing!   I discovered this hobby some years ago and I am still addicted - and this type of jewellery making in particular really grabbed me because it allowed me to put my love of painting and graphic design to good use.

This blog is dedicated to this very specific kind of jewellery you can make yourself - personalised jewellery that allows you to use your own artwork or photographs, embedded in glazes and resins or sitting behind glass, to be adored and to adorn - beautiful and meaningful pieces of keepsake art that you can make yourself easily at home.  It is a hobby that is enjoyed by many people, a lot of whom have turned it into a profitable small business, and I hope this blog will go some way to convey the enthusiasm I have for the craft.

This blog will go hand in hand with my supplies shop, Jasmin Studio Crafts, and I hope it will eventually become a showcase of work, both mine and yours, and an archive of ideas and inspiration, tips and techniques that we can all contribute to. I want it to be a place where you can learn and ask questions, meet like-minded individuals and show off your latest creations.  I will be offering tutorials, reviewing new products and sharing freebies and you will be first to hear about special offers on products from my shop.

Taking my jewellery hat off now - I am also a mum to a beautiful little girl who stretches my imagination more than anything or anyone I have ever known, and fills my every day with joy.  And she is turning out to have a very crafty side too - I'll call it an added bonus.  :)

I have 1001 loves and hobbies - from dollhouse miniatures to books, to cooking to walks - but there is always something jewellery-related that seems to take over these days!

Anyway back to topic - want to learn to make gorgeous jewellery such as this?


Then, on with the show!