Great news for European customers! We have tweaked our website so customers in Europe now pay less for their postage!
The standard cost to Europe is reduced to £3 for the first item (though some heavy items such as ModPodge will be £5), and each subsequent item is now £0.25 (£0.50 for heavy items). Orders with purchased upgrades will be sent by registered & trackable delivery.
Countries included within Europe are as defined by Royal Mail here: http://www.royalmail.com/gear/content/html/content/ctf/rm/europe.html
Postage within the UK stays at £2.50 for all orders, regardless of size.
And postage to the rest of the world remains unchanged at £5 for the first item (£7 for heavy items) and £0.50 (£0.70) for each subsequent item. Orders with purchased upgrades will be sent by registered and trackable delivery.

Friday, 23 September 2011

Tuesday, 13 September 2011
New! Scrabble Tiles ...well, not quite
Finally back in the shop, beautiful wooden tiles for all your handmade jewellery. Equally as useful for making pendants, earrings or ring toppers, these are really gorgeus and easy to use. Just Modpodge a (sealed) image to the reverse of the tile, and when dry, coat with a layer of glaze. Done!

Actually... they are not Scrabble - I have been asking the Scrabble licence owners for some time now for their permission to supply their gamepieces (that is Mattel in the UK) to the jewellery making world, and the outcome is that they do not allow their tiles to be sold for purposes other than the game. I think it is important to note this especially if you intend to sell your jewellery.
So we have been on the hunt for a good alternative for a long time, and having kissed many frogs, we have now found our wooden tile prince! In all respects these tiles are just like those in the famous game: smooth and tactile, flat at the back and nicely finished, so they will be perfect for all your wooden tile jewellery.

So we have been on the hunt for a good alternative for a long time, and having kissed many frogs, we have now found our wooden tile prince! In all respects these tiles are just like those in the famous game: smooth and tactile, flat at the back and nicely finished, so they will be perfect for all your wooden tile jewellery.
They measure 18.5 x 20.5mm, and will suit any of our bails. And - uhhh - just to make our crafting lives that little bit easier, matching epoxy stickers will be here soon! :D
Friday, 2 September 2011
100 Likers Freepost Offer

To celebrate reaching 100 likers on Facebook, we are offering Free UK Postage on all orders through the website up until midnight Sunday 4th, just use code "100LIKERS" at checkout. International customers will receive a £2.50 discount on their order. Stock up now for all your Christmas makes!
Visit our Facebook page @ Jasmin Studio Crafts.
Monday, 29 August 2011
DG3 Project - Glittery Jewellery
DG3, one of the glazes that works really well with glass tile jewellery, can also be used to fill some shallow bezels. I thought glittery jewellery was a good and super-easy project to explain how DG3 can be used to do this.

I got together my DG3, some small bezels (here I have 10mm silver plated shallow round bezels of the kind I sell with my dangly earrings) and some glitter.

Simply spread a drop of DG3 inside the bezels making sure it covers the entire surface and then carefully sprinkle your choice of glitter on top.

It will make a little mound of glitter - and you leave this to dry for a day or two.

When dry, you can shake off the excess glitter, you will see the inside of the bezels will have flattened and may dip a little - nothing to worry about. Add a final layer of DG3 over the glitter straight from the bottle, again making sure it reaches all edges and the glitter is all covered - however be careful not to add too much, you just need a thin coating.
Leave to dry for a couple of days and hang from some earwires, for a beautiful pair of earrings that look like they took a lot more effort to make than they really did.

However, DG3 does have its own peculiarities and I want to tell you about them to make sure you know what it can and cannot do. Firstly, it's important to note it is not a resin - it is a glaze, and so it can only do light coverings over your chosen inserts.
Too many layers, too-thick layers, or glaze added over layers that have not dried will result in bubbles and a cloudy finished piece:

However, if you go slow and are careful not to overfill your bezels, you can even use a large pendant tray:

This one was made on a 25mm square tray with three different colours of glitter, yellow in the middle, orange around it, and then red on the top edges. The glaze does not fill the tray to the top, I think if I had added any more DG3 to this, it may have turned cloudy, so I am happy to keep it as it is.
And a super important bit of information: DG3 does not dry rock-hard - in fact it retains a lot of flexibility and it will not stand up well to knocks and scratches, therefore I would not recommend that you use it on items of jewellery that would receive a lot of wear - generally rings and bracelets have to survive the most wear, whereas pendants and earrings do not. Still, I could not resist having a go:

Gorgeous huh? Sadly it's not exactly practical. See the darkest red bezel? When I stored this bracelet the bar on the toggle clasp sat over the DG3 on the red tray, and look, you can see quite clearly how it has left a rather deep mark! So no, this lovely thing will not live up to normal daily wear, so it is not recommended that you use DG3 on bracelets and rings, and just to be on the safe side, you should warn your customers that they have to handle and store very carefully any pieces that you have made with DG3, to prevent them knocking against one another, as it will mark.
However, there are plenty other things you can do with DG3 - like Diamond Glaze and resins, it has a tendency to pull into itself and form a drop, so you can use it over flat surfaces as decoration. I made some colourful glitter droplets over the flat pad hair pins that I have - I think these look rather nice:

You must dry them straight however. Want to know a little trick? Jewellers working with metal clay already know the wonderful multi-uses of an old pack of playing cards! And here, they were used to stand the bobby pins perfectly horizontal until the glaze dried. But of course any sturdy bit of card or plastic will do.

There are many other things to use as well as glitter, however you need to ensure it is small enough that you won't need a deep covering of DG3 that could turn the item cloudy.
Oh and one last thing - Diamond Glaze and DG3 do not behave the same way. Diamond Glaze will often dry bubbly if used to fill bezels so it will be risky to use it on the ideas shown here as more layers usually mean more bubbles - having said that, it can be used to glue things and as a glossy top layer over a sealed image.
See what ideas you come up with and show us your makes on our Facebook page @ Jasmin Studio Crafts!

I got together my DG3, some small bezels (here I have 10mm silver plated shallow round bezels of the kind I sell with my dangly earrings) and some glitter.

Simply spread a drop of DG3 inside the bezels making sure it covers the entire surface and then carefully sprinkle your choice of glitter on top.

It will make a little mound of glitter - and you leave this to dry for a day or two.

When dry, you can shake off the excess glitter, you will see the inside of the bezels will have flattened and may dip a little - nothing to worry about. Add a final layer of DG3 over the glitter straight from the bottle, again making sure it reaches all edges and the glitter is all covered - however be careful not to add too much, you just need a thin coating.
Leave to dry for a couple of days and hang from some earwires, for a beautiful pair of earrings that look like they took a lot more effort to make than they really did.

However, DG3 does have its own peculiarities and I want to tell you about them to make sure you know what it can and cannot do. Firstly, it's important to note it is not a resin - it is a glaze, and so it can only do light coverings over your chosen inserts.
Too many layers, too-thick layers, or glaze added over layers that have not dried will result in bubbles and a cloudy finished piece:

However, if you go slow and are careful not to overfill your bezels, you can even use a large pendant tray:

This one was made on a 25mm square tray with three different colours of glitter, yellow in the middle, orange around it, and then red on the top edges. The glaze does not fill the tray to the top, I think if I had added any more DG3 to this, it may have turned cloudy, so I am happy to keep it as it is.
And a super important bit of information: DG3 does not dry rock-hard - in fact it retains a lot of flexibility and it will not stand up well to knocks and scratches, therefore I would not recommend that you use it on items of jewellery that would receive a lot of wear - generally rings and bracelets have to survive the most wear, whereas pendants and earrings do not. Still, I could not resist having a go:

Gorgeous huh? Sadly it's not exactly practical. See the darkest red bezel? When I stored this bracelet the bar on the toggle clasp sat over the DG3 on the red tray, and look, you can see quite clearly how it has left a rather deep mark! So no, this lovely thing will not live up to normal daily wear, so it is not recommended that you use DG3 on bracelets and rings, and just to be on the safe side, you should warn your customers that they have to handle and store very carefully any pieces that you have made with DG3, to prevent them knocking against one another, as it will mark.
However, there are plenty other things you can do with DG3 - like Diamond Glaze and resins, it has a tendency to pull into itself and form a drop, so you can use it over flat surfaces as decoration. I made some colourful glitter droplets over the flat pad hair pins that I have - I think these look rather nice:

You must dry them straight however. Want to know a little trick? Jewellers working with metal clay already know the wonderful multi-uses of an old pack of playing cards! And here, they were used to stand the bobby pins perfectly horizontal until the glaze dried. But of course any sturdy bit of card or plastic will do.

There are many other things to use as well as glitter, however you need to ensure it is small enough that you won't need a deep covering of DG3 that could turn the item cloudy.
Oh and one last thing - Diamond Glaze and DG3 do not behave the same way. Diamond Glaze will often dry bubbly if used to fill bezels so it will be risky to use it on the ideas shown here as more layers usually mean more bubbles - having said that, it can be used to glue things and as a glossy top layer over a sealed image.
See what ideas you come up with and show us your makes on our Facebook page @ Jasmin Studio Crafts!
Saturday, 27 August 2011
Just Arrived: High Domes!
Very excited about these new cabs I have just received - these beautiful bubbles are high domed solid glass pieces that measure 25mm across ...and they are a colossal 11mm high! They are just as clear as our popular 25mm glass pieces, so if you thought our usual cabs did wonders on your images, wait until you try these!
See these new high domes (left) compared to our standard 25mm cabochons (right):


We also have for sale high domes in 12mm and 15mm, and more sizes will be coming to the shop soon. Three cheers for choice!
See these new high domes (left) compared to our standard 25mm cabochons (right):


We also have for sale high domes in 12mm and 15mm, and more sizes will be coming to the shop soon. Three cheers for choice!
Glass Painting Fun
I have always thought that our glass pieces lend themselves beautifully to being painted, and yeay, I was right!! I bought some Lefranc & Bourgeois glass paints and outliners and set myself up in the garden (one rare warm day).

Amazing! The paints were easy to use and came in a pack of 10 small pots of colour.
For some pieces I just painted straight onto the back of the glass, and for some others I used the outliners and painted in between the lines (after they had dried) to create some definition and metallic accents. It took a little experimenting to get the lines to be thin enough not to overwhelm the little glass pieces, but it was easy enough even for me!


Amazing! The paints were easy to use and came in a pack of 10 small pots of colour.
For some pieces I just painted straight onto the back of the glass, and for some others I used the outliners and painted in between the lines (after they had dried) to create some definition and metallic accents. It took a little experimenting to get the lines to be thin enough not to overwhelm the little glass pieces, but it was easy enough even for me!

You don't have to paint the back of the glass either, you may prefer to paint the front of your tiles and take advantage of the puffy effect of the outliners, but painting the back means you retain the 3d effect that the glass gives, and it looks rather beautiful. But if you do paint the back, you will need to remember that you are working back to front, so the detail needs to be painted first, and the backgrounds last. Also, remember that you need to write in mirror image for any text to show properly when reversed - this will not do:

Ha ha, me thinking that writing upside down was the way to do it...

Evidently not!

Now that's better!
The painting itself is really easy - if you want to use an outliner, just apply it very very gently as it's easy to make lines too thick. However, if you are very careful you can scrape any stray bits when dry.

Then you can apply the paint with a soft brush - there is a brush provided with the paint sets, or you may prefer a thinner one for detailed painting. You do need to make sure your glass is very clean and free of grease to begin with.
The outliners are available in silver, gold and black, and the paints are available in two finishes: opaque and transparent. The paints come in sample packs of ten diddy pots in the following colours:
Transparent Colours are: Lemon Yellow, Mandarin, Red, Magenta, Purple, Light Blue, Dark Blue, Light Green, Dark Green, Brown
Opaque Colours are: White, Black, Brown, Tan, Dark Green, Mid-Green, Dark Blue, Mid-Blue, Yellow, Red

Colour sampler - transparents to the left, opaques to the right.
(Think I applied the transparents a bit too thickly that they look opaque!)
Colours can be mixed and you can make your own combinations. Wet colours applied side by side will end up mixed, so to keep colours true just apply your colours in layers, making sure each layer is dry before applying the next - this takes about an hour or so. Or you can try marbling or fading effects by using wet paint.
I have made several examples and will show them once I have made them into finished jewellery - they look rather fab!

Work in progress
After you have waited 3 days for your piece to dry, you can bake it in your home oven at 150oC (300oF, gas mark 2) for 30 minutes after which the paint becomes permanent and can even be dishwashed! Ok, so you may not have a need to pop your jewellery in the dishwasher - but your new-found hobby doesn't need to stop at jewellery. Think of the new gifting possibilities.... personalised celebratory champagne glasses? Customised mugs for each member of the family? Unique ceramic tiles for your bathroom? Just ensure that the painted area will not come into contact with food (more than anything because constant scratching by cutlery would affect your image) and will not be painted into dishes that are meant to go in the oven at high temperatures, but beyond that, the glass and ceramic decorating world is really your oyster.
I have brain buzz. Can you hear it?
If you are interested in purchasing these paints, they are available in the shop.
Thursday, 25 August 2011
Novel Jewellery Design
Hello world!! I am here, we have had a small break (though we didn't manage to do much more than a few day trips!) but mostly we have been at home, planning the next work effort, but mostly just 'being'. It feels like I have been away from this blog forever, and I apologise for this - most of you will know that I have a five year old daughter, and when she is home from school, life takes on a different rhythm. We are a little more relaxed about things, we eat a proper breakfast, we talk, and we make things. Jewellery-making is - obviously - a favourite past time in our house, and of course, all her attempts, from threading a simple pendant to stringing a few wooden beads to make a bracelet, are met with excited "ooohs" and "aaaahs" from her very captive audience.
Recently my mini-crafter grabbed a few supplies from my spares drawer, laid them all out on the table, and announced she was going to make some wooden tile pendants. She called me ten minutes later to show me her creation... and I let out the loudest whoop when I saw her novel approach to pendant making.

All beautifully glued together. And the best bit? When you get bored of wearing your pendant, you can stick it to your fridge.

Smile!
Recently my mini-crafter grabbed a few supplies from my spares drawer, laid them all out on the table, and announced she was going to make some wooden tile pendants. She called me ten minutes later to show me her creation... and I let out the loudest whoop when I saw her novel approach to pendant making.

All beautifully glued together. And the best bit? When you get bored of wearing your pendant, you can stick it to your fridge.

Smile!
Wednesday, 20 July 2011
Summer Timetable for Posting Orders
I always try to send out orders reasonably quickly, normally within a day or two of payment, but now that summer is pretending to be here (it's cooold!) and school summer holidays start today, I figured I needed to set a formal timetable for posting orders.
There will now be three posting days per week, Mondays, Wednesdays and Fridays, and orders need to be received before 12pm on each of those days for the order to be sent on the same day. If at any time posting on that day is not possible, I will let you know and more than likely the order will go the following day.
We will also be taking a week's holiday from 15-21 August when I won't be able to process any orders, but we will be looking forward to opening the shop again after that with lots of gorgeous new products for your jewellery making!
There will now be three posting days per week, Mondays, Wednesdays and Fridays, and orders need to be received before 12pm on each of those days for the order to be sent on the same day. If at any time posting on that day is not possible, I will let you know and more than likely the order will go the following day.
We will also be taking a week's holiday from 15-21 August when I won't be able to process any orders, but we will be looking forward to opening the shop again after that with lots of gorgeous new products for your jewellery making!
Tuesday, 19 July 2011
Pyrography Is Not For Me...
Having recently added the wooden tiles to the range, and already having rather a lot of equipment from my other life - I figured I should absolutely try pyrography, the art of burning a beautiful design onto wood. Well, I can sort of draw, and I'm pretty deft with a torch, so I figured it should be easy.
Easy?? Yeah, right.


One-handed-switch-on and off I go sintering away...

I'm resting on two soldering sheets over a floor tile over an Ikea table!

By this point I was already worried - it is harder than it looks to hold the torch steady, and despite the fine point I was sinking into the wood faster than I could move it!

Result - a pig's ear. That's meant to be a "J" surrounded by tasteful swirls, but I think I really can spy an actual pig's ear.
I'd need more practice, but probably a thousand years of practice couldn't change a bad pyrographer, so that's, regretfully, another one I'll leave to the experts I think.
....Or at least until the would-be conqueror in me pushes me to try it *just* one more time.
Then I can have a matching set of pig's ear-rings! oink oink! :)
Easy?? Yeah, right.

This is one of my smaller torches, my trusty little dremel Versatip. It comes with various attachments that I can't figure out, so I generally just use it as an open flame - however, it has a nifty tip for pyrography.

One-handed-switch-on and off I go sintering away...

I'm resting on two soldering sheets over a floor tile over an Ikea table!

By this point I was already worried - it is harder than it looks to hold the torch steady, and despite the fine point I was sinking into the wood faster than I could move it!

Result - a pig's ear. That's meant to be a "J" surrounded by tasteful swirls, but I think I really can spy an actual pig's ear.
I'd need more practice, but probably a thousand years of practice couldn't change a bad pyrographer, so that's, regretfully, another one I'll leave to the experts I think.
....Or at least until the would-be conqueror in me pushes me to try it *just* one more time.
Then I can have a matching set of pig's ear-rings! oink oink! :)
Friday, 24 June 2011
Fluxe vs Amazing Glaze, a Comparison Guest Blog
Seeing as my list of things to do just keeps growing, I thought I should hand over a review of Fluxe and Amazing Glaze to the uber-crafty Vicky from Tynemouth Collectables, she's always trying out new products and methods so I thought I would ask her if she would do this for me - luckily she agreed, and these are her findings. Thank you so much, Vicky!!




Judikins Fluxe vs Amazing Glaze – Get Set to be A-Glazed!
When asked if I would be guest blogger for Jasmin I was quite flattered and more than keen to help her work out the difference between Judikins Fluxe Enamelling Resin and their Amazing Glaze Embossing Glaze. By all intents and purposes, when researching the two on the good ole internet it is very hard to differentiate between them.
OK, Amazing Glaze is designed to be used with embossing powders and the likes for making a glaze on all sorts of paper and card surfaces – ideal for cardmakers and scrapbookers alike.
Fluxe is described as an “enamelling” resin and can be used on a wide variety of surfaces including metal and glass. I therefore would have expected Fluxe to appeal more to my uses in making jewellery and filling small metal trays or pateras. So I was surprised to find in one of the “projects” featured on Judikins website, they were filling their trays with Amazing Glaze? Hmm…the confusion abounds!! I had no choice but to do a test and compare results!!

Firstly I drew a 1” circle around two images that I was going to use and cut them out, making sure I removed the part with the pen line. I then lined the inside of the tray with Mod Podge, placed each disc of paper on top, gently pressed it down to remove any bubbles and smooth the paper.


I then gave it a second coating of Mod Podge. This both glues the paper in place and seals the paper to prevent any of the inks from running. After leaving the trays to dry, I lined them up and put a small amount of an old embossing powder I had, to add some sparkle and put along side it a small heart shaped charm so that I could play with how easy it is to move items around and to add an extra dimension to the pendants. I dipped the tray in to the pot of Amazing Glaze, levelled it flat and then filled the second tray with the Fluxe.

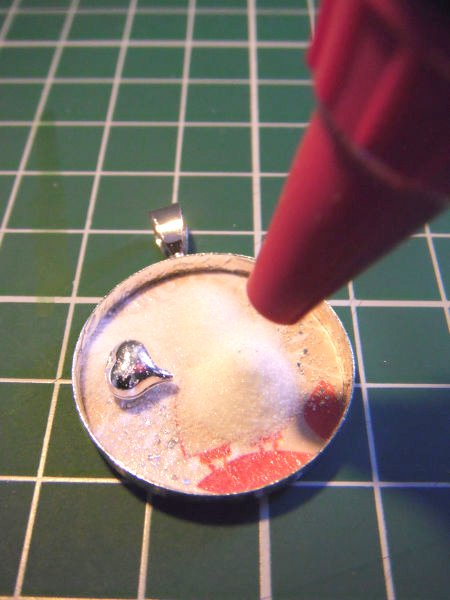
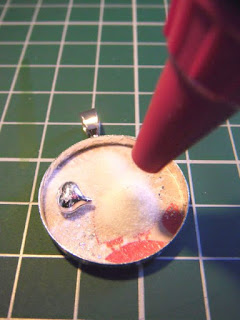
Having two small dogs and a flight of stairs to contend with when carrying these trays from my crafting area to our grill/oven, I decided health and safety was more important and set to work with my heat gun. (Please be aware, if you pile the powder high, a heat gun will blow the top layer of glaze across your table!)


Both powders melt in the same way and have the appearance of melting sugar. As the top layer melts, it rolls away to the sides, exposing the powder underneath until all has been melted. When the glaze is still soft, you can move around any little charms or embellishments you used until you are happy.

I used a pair of bent nose pliers, but a pair of tweezers would do the same job. Be Careful not to touch the pendant with your fingers as it will still be very hot. I had to refill the trays an extra three times to fill the tray to the top, so this is brilliant to give you the opportunity to add different embellishments in different layers. Should your tweezers get stuck in the resin, or if your charm or embellishment gets stuck in the wrong position, you can reheat the resin until soft and move the item accordingly.

Leave your pendant to cool for a few minutes and Hey Presto! You have your perfectly set, hardened, ready to wear pendant! Attach a necklace and away you go!
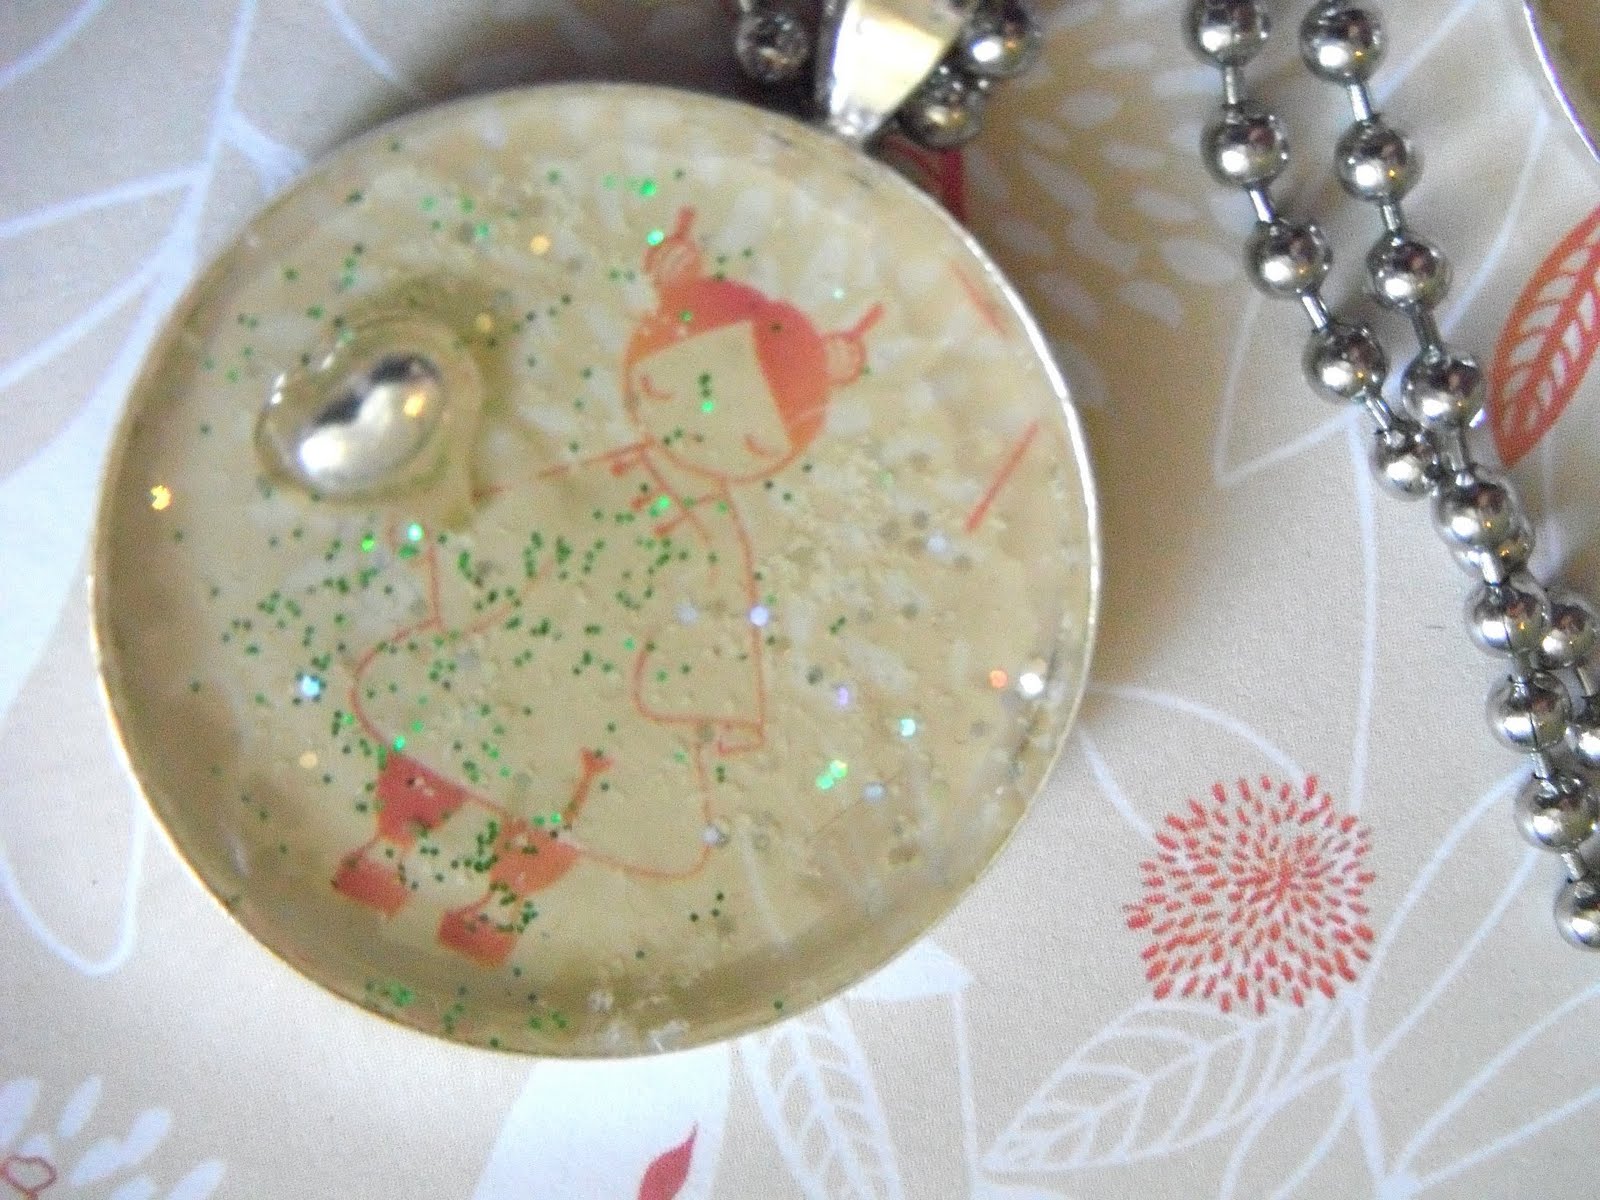
But that still hasn’t answered my question about the main difference between the two? It’s tough. They have the same consistency, they melt the same and they set the same. Initially they look the same so in all honesty, I don’t see a whole lot of difference. The picture below shows the two trays side by side. The one on the right is made using Amazing Glaze, the one on the left with Fluxe. I find that the Amazing Glaze has perhaps a slightly clearer appearance to the Fluxe.

Amazing Glaze is a bit more forgiving when wiping off any melted glaze from the tray, whereas the Fluxe was a lot more stubborn. I left both trays overnight before writing this post and have discovered that the Amazing Glaze seems to have turned slightly darker.
Compare the two again below, sitting atop the original paper. The Amazing Glaze is somewhat darker than the Fluxe.

All in all, both glazes are easy to use, non-toxic and suitable for anyone able to use a heat gun. They can both be melted at 130oC in a toaster oven – though I have not tried this so cannot advise, but I hear that you don’t get the problem of the powder blowing away then.
The glazes will be perfect for those projects that I want to look a bit more weathered, maybe using an antiqued vintage setting, so I think I will definitely be playing some more with the glazes. Which is better? It all depends on your needs and what effect you wish to gain.
Happy experimenting!
Subscribe to:
Posts (Atom)